

If you're running an online store with Magento 2, you might want to change the logo on your website to better reflect your brand. Changing the logo in Magento 2 is a simple process, and in this article, we will guide you through the steps.
Step 1: Log in to Magento Admin Panel To begin with, log in to your Magento 2 admin panel.
Step 2: Navigate to the Content Section Once you're logged in, navigate to the "Content" section in the left-hand sidebar of the admin panel.
Step 3: Select Design Under "Content," select "Design" from the dropdown menu.
Step 4: Choose Configuration In the "Design" section, choose the "Configuration" option.
Step 5: Select Theme You will see a list of themes that are installed in your Magento 2 store. Choose the theme for which you want to change the logo.
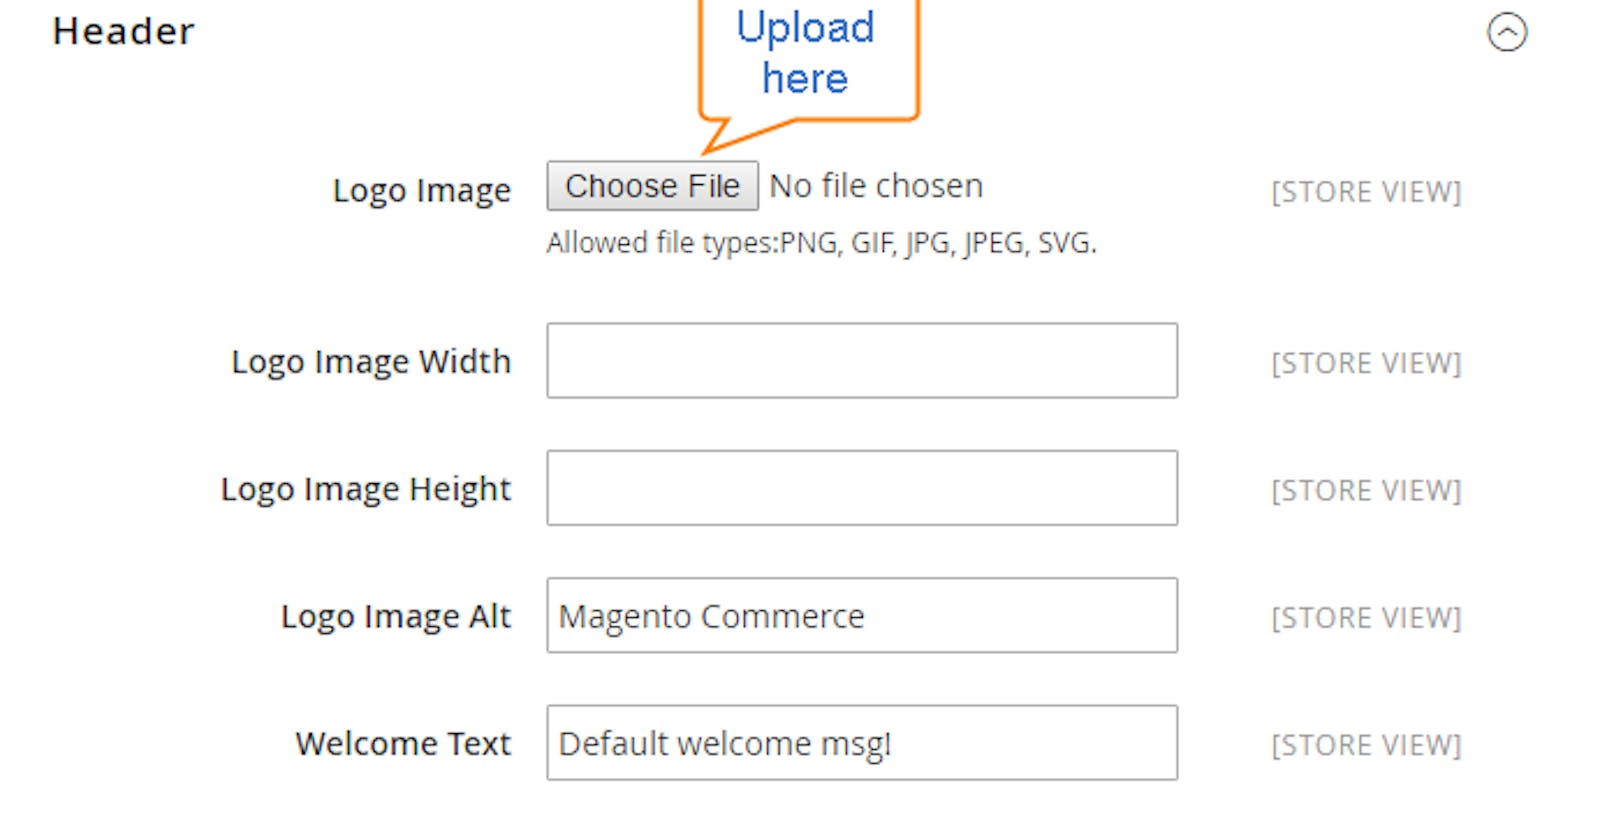
Step 6: Open Header Tab Once you've selected the theme, click on the "Edit" button in the "Action" column. This will open up the theme configuration page. Click on the "Header" tab.
Step 7: Upload New Logo In the "Header" tab, you will see the option to upload a new logo. Click on the "Choose File" button to select the new logo file from your computer.
Step 8: Save Configuration After you have uploaded the new logo, click on the "Save Configuration" button at the top of the page.
Step 9: Refresh Cache Finally, clear your Magento 2 cache by navigating to the "Cache Management" section and clicking on the "Flush Magento Cache" button.
Conclusion Changing the logo in Magento 2 is a simple process that can be done quickly through the admin panel. By following the steps outlined in this article, you can easily update your website's logo to better reflect your brand.